Showing posts with label vegetables. Show all posts

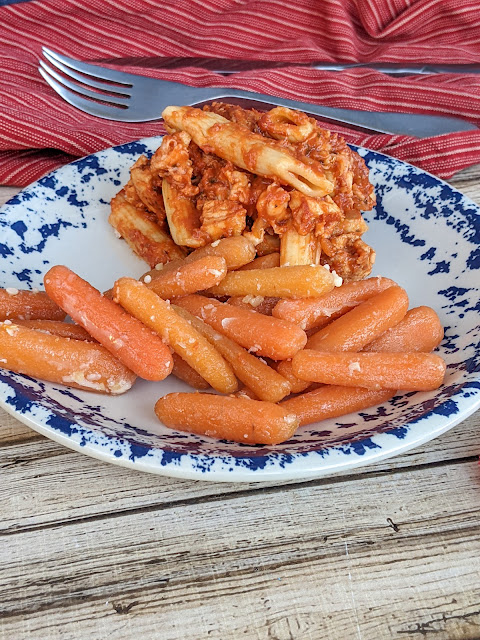
Instant Pot Butter Garlic Glazed Carrots

 Carrots are such a good side dish to add to your meal plan because they are so affordable. This recipe makes them super easy to make. Plus this recipe is great for kids; it is lightly sweet, very buttery and has just the right amount of garlic to spice things up.


I know I am not the only one who has been feeling the strain of the economy. Groceries cost more, gas prices are high, and the cost of cooling the house all summer and running the sprinklers to keep the kids cool has caught up with us. I have been trying to shop smart and make the most of our budget at the grocery shops.

I have found that carrots are a great side dish to serve my family. It fills them up, and it is something different. We like carrots, but honestly, I don't know if I have ever really cooked with them, aside from making a pretty good carrot soup on occasion. Carrots are especially nice when they are marked down in the produce section. A few weeks back, I found a one pound bag of organic whole carrots for 49 cents. I sliced them into rounds and prepared them like this. Everyone liked them. So when I found mini carrots at Kroger, marked down to 79 cents, I grabbed 2 bags and worked them into our meals.

This recipe is good because it is so easy to make if you have a pressure cooker. It goes well with a variety of beef dishes, chicken, or fish and I even served it with leftover pasta last night. 


Ingredients
1 pound of baby carrots

3 tablespoons of butter

1 tablespoon of minced garlic

½ c light brown sugar

1 ½ to 2 cups of water


Add brown sugar, butter and minced garlic to the instant pot.


Add carrots, and cover with water.

Give everything a stir to make sure the carrots are covered with the water.


Place the lid on the instant pot.

Seal the instant pot.

Use the manual setting, and set the timer for 8 minutes.

When the timer dings, allow the instant pot to naturally release pressure for 3 minutes, then use the quick release valve.

Remove the lid and stir.

Serve the carrots immediately.

Store leftovers in an airtight container after they have cooled.


These are so tender, and have such a great flavor. I am sure you are going to love it.  Plus it is fuss free and you can probably get 2 meals worth out of a bag of carrots if you are cooking for 4 like I am. If you don't want to eat carrots 2 nights in a row, you can freeze the remaining carrots. You know how I feel about freezing veggies! Do it! I would recommend blanching them first though.


This carrot patch activity might be a good way to get the kids excited about carrots before serving this side.


This sheet pan shrimp, potatoes, carrots and asparagus recipe is also a great way to use up any leftover mini carrots you might have after serving this.

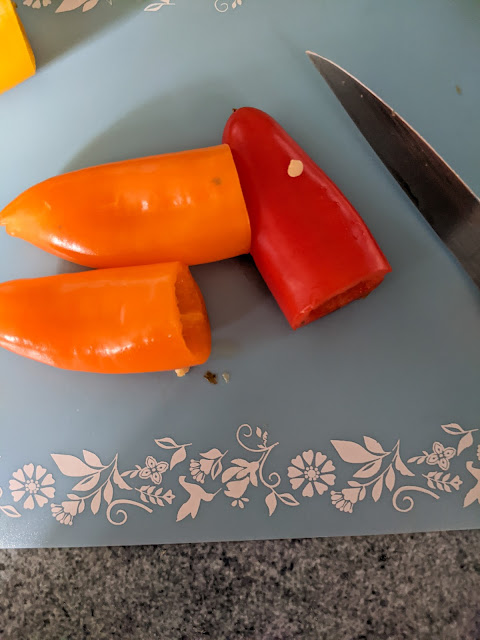
How To Freeze Mini Sweet Peppers

 If you have time to visit your local farmers market this week; this is the time to stock up on all the tasty little peppers that are available right now. I am a farmers market enthusiast for sure. There is nothing quite like a basket of freshly picked, locally grown veggies for $1. 

Sliced Mini Peppers, ready for the freezer


I have been buying everything in season from sweet onions, to asparagus and corn on the cob and sticking it in my freezer for the winter. I wish I could can, but I have a cook top stove and have been told those don't heat evenly for safe canning.

Last week, my favorite farmer at the market had small baskets of mini sweet peppers, jalapeno pepper and wax peppers for $1. I was told they were picked that morning. They were perfect, beautiful and vibrant, they smelled like summer should. I bought 3 baskets of each. We kept a basket that we mixed from the variety aside for fresh eating, and then I prepared the rest for the freezer.


Wash and cut the tops off of the mini sweet peppers.

Clear out the seeds and slice them at desired thickness.


Lay the peppers on a paper towel to dry the juices.

Place the peppers in a single layer on a plate.

Pop the peppers in the freezer for 45 minutes.

Remove from the freezer and transfer to a freezer bag or a food saver bag. Try to remove as much air as possible.


Place in the freezer for up to 1 year.


I usually add 3 or 4 peppers per food storage bag, because that is the amount that my family uses, but, you can adjust the amount of sliced peppers you add to each pack.

You might be wondering how to use the pepper slices after they have been frozen?
I like to add them to crock pot meals, casseroles, scrambled eggs, etc. 
They are perfect for sheet pan fajitas. 
I like to mix the peppers and onion together to freeze for easy chili veggies.
In general, they are perfect for use, just like any other frozen peppers you might buy at the store, but so much cheaper! I can make several packs to use later for about 25 cents each.


Find more money saving ideas here:

6 Things Not To Bargain Shop For 


NatureSweet Cherubs Greek Salad

My friends over at NatureSweet asked me if I would like to share a recipe with my readers, just in time for spring. Of course I jumped at the chance!


Course Type: Side Salad
Preparation Time: 10 minutes
Short Summary: A classic Mediterranean favorite

Ingredients:

  • 1 pkg Fresh Express® Spring Mix
  • 2 Tbsp pitted black olives, sliced
  • 1 cup NatureSweet® Cherubs® Tomatoes
  • 1/2 cup red onion, sliced
  • 1/2 cup feta cheese, crumbled
  • 4 whole pepperoncinis
  • Your favorite balsamic or tarragon vinaigrette dressing

Instructions:

  1. Place Fresh Express® Spring Mix into a large salad bowl.
  2. Top with olives, NatureSweet® Cherubs® Tomatoes and onions. Add cheese and pepperoncinis. Drizzle dressing over salad.
Stay tuned, I will be developing a recipe that is perfect for spring and summer eating featuring my favorite little tomatoes!