Showing posts with label pumpkins. Show all posts

Cork Your Excitement! It's Pumpkin Painting Time!

Calling all crafty kiddos (and grown-up helpers)! Fall is in the air, and that means pumpkins are everywhere! But this year, why not skip the mess of carving and try a fun, textured pumpkin project using everyone's favorite leftover - wine corks?


Looking for a fun and festive fall craft for the kids? Look no further than cork pumpkins! This project is perfect for little hands and even littler attention spans. It's easy to set up, uses recycled materials, and lets kids unleash their creativity. Plus, it's a great way to introduce them to painting in a tactile way.


Here's what you'll need:

  • Wine corks (enough for each child to make a pumpkin)
  • A paper plate
  • White paper
  • Orange paint
  • Paint brushes
  • Green paint
  • Black paint 


Pour a quarter sized drop of paint onto a paper plate.
Offer your little artists the corks, and encourage them to begin by stamping a circle shape with one color of orange paint.

Encourage the kids to now fill in the large outline of a circle by dipping their cork into orange paint and stamping it in.


When the pumpkin is filled in, dip the side of the cork into the green paint.


Slide the cork upwards to form a stem. 
Let the kids dot the stem with the wine cork.


Allow to dry and display on the fridge.
These are so cute and fun that you might want to make a few and share with a special neighbor or a grandparent.


Building Fine Motor Skills

Grasping a wine cork is a great way for little hands to develop the strength and dexterity needed for important tasks like writing and buttoning clothes. The wide, rounded surface is easy for children to hold, allowing them to focus on the creative process rather than struggling with grip.

Encouraging Exploration and Experimentation

Cork painting is all about having fun and getting messy! There's no right or wrong way to use a cork stamp. Kids can experiment with different dipping techniques, applying pressure to create lighter or darker prints, and even using multiple colors at once. This freedom to explore fosters a love of learning and experimentation, which are essential for a child's development.


Find more favorite cork painting projects here:

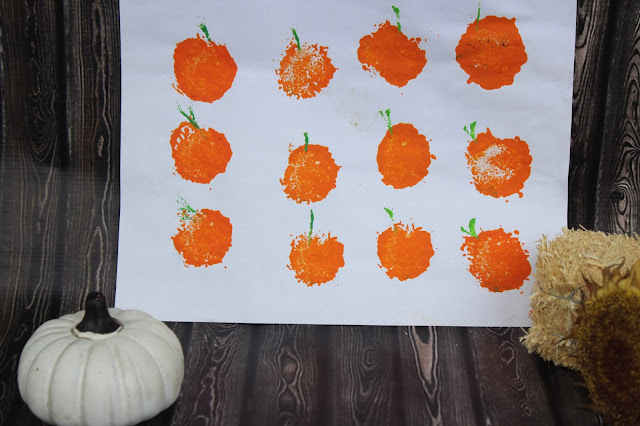
Sunflower Stamped Pumpkin Patch Art


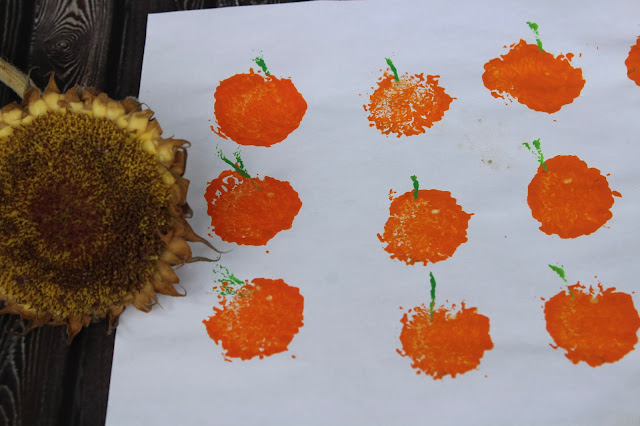
This adorable pumpkin patch art is great for kids of all ages! Made with simple supplies like paint, paper and a sunflower head, this is a great way to create art using nature!


Harper and I love to paint together. We have been crafting side by side since she was just a tiny toddler, strapped into a high chair for safety. We have painted pineapples, apples, baskets of fruit and even Christmas trees. We usually use corks to create our process art, but we had a bouquet of sunflowers that had seen better days, and well, inspiration hit.

We decided our fridge just had to have a pumpkin patch scene. We are all about creating refrigerator masterpieces 

Supplies:

Orange paint

Green paint

A sunflower head

White paper

A paper plate


Pour orange paint and a small amount of green paint onto a paper plate.


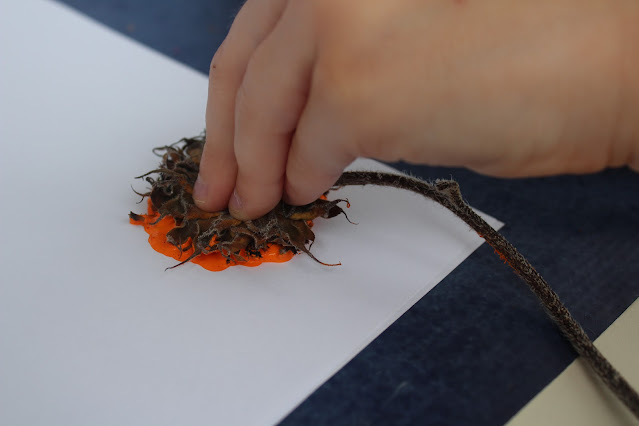
Invite your child to press the sunflower head into the orange paint.

Encourage your child to press the sunflower onto the paper.


Use a stem, petal, or other small item to form the stem of the pumpkin with the green paint.

Allow the paint to dry, then


These were so much fun to make! And I think they turned out really cute! Harper was very proud of her efforts. Preschoolers can handle this project, as well as elementary aged kids like Harper. Your kids might also like to draw little pumpkin faces on these after they have dried.


I hope you get a chance to try this project with your family, it is the perfect project for a fall afternoon!

Find more fall ideas here.


Play Doh Pumpkin Faces

Play Doh Pumpkin Faces are perfect for hands on play on a fall day.


My kids want to carve a pumpkin or two every day. It becomes a whole thing. From the face, to the roasting of the seeds and then displaying. They really take things seriously at Halloween.
While I love to do pumpkins with them, I don't always have time to carve a pumpkin a day. This year I found a way to give them what they want anytime they want it with these play doh pumpkin faces!

This post contains affiliate links. I will earn an advertiser fee if you make a purchase. Thanks!

This is such an easy activity! All you need are 2 cans of play doh and a sheet of black paper and you are in business.


First, invite your child to cut out various shapes for the pumpkin face. Ovals, triangles, squares and creepy teeth are perfect.

Then invite your child to smash the orange play doh into the shape of a pumpkin.
Use green play doh if you desire a stem.

Now, let your child make as many faces as they want.
This is a fun way to keep them busy and happily making pumpkin faces for hours.


If you liked this Halloween activity, check out all of my Halloween ideas.