Showing posts with label mommy. Show all posts

Making Sandwiches with Harper {Kids Craft}

A few days ago, Little Miss Harper wanted to help me make lunch. I love her eagerness to help and her interest in learning. But, on this particular day, I wanted to keep her busy and out of the kitchen, as I was in the middle of a project.

I asked her if she wanted to make paper sandwiches while I made lunch, it sounded appealing to her! I had a collection of paper sandwich fixings ready for an occasion like this. I found a yellow glue stick to imitate mustard. Harper was all set to make sandwiches!

To prepare for this activity I had previously cut the following shapes from construction paper

bread shapes  white paper
red circles for tomatoes
squiggly green leaves for lettuce
yellow squares for cheese
brown circles for meat

You will need a glue stick. Red or Yellow is fun with this paper food craft, like ketchup and mustard!


As you can see, this activity is completely basic. Construction paper and glue. I offered Harper ample supplies for building sandwiches. To keep her busy and having a lot of fun!


She began by adding mustard to the bread and adding tomatoes.


Next up was cheese! 


Harper was completely into this craft. She loved making sandwiches. She added layer upon layer, happily crafting while I made lunch!


My kids both love a good paper food craft! If I find myself with a few extra moments and a pack of construction paper I make little craft bags for occasions like this day.  They are always a huge hit with my kids. They have enjoyed making paper cookies, paper pizzas and paper jam sandwiches. These are the best kind of kid food crafts in my opinion because they are virtually mess free and they are really a lot of fun!

Gourmet Homemade Oreo Marshmallows

It was one of those days, the cupboards were growing bleak, the need to grocery shop was strong, but the interest wasn't there. I knew I could put it off another day. {Face it, shopping with two young children is not fun!}

After whipping up an easy peasy dinner, I knew that dessert was in order too. I had 3 ingredients on hand and this little bit of yum is what I came up with!


To make Oreo Marshmallows you will need:
White Chocolate
Oreos
Marshmallows

First melt your white chocolate in the microwave, stirring every 25 seconds or so until it is smooth.
Crush Oreos, place in a bowl.
Dip your marshmallow into the melted chocolate, immediately dip it into crushed Oreos. 
Set aside for about 25 minutes until the chocolate has set.
Enjoy!


My family loved these! They were soft, sweet and had bits of crunch thanks to the chunks or Oreo cookies. This was an incredibly easy treat to make with a gourmet flavor perfect for kids of all ages!

Do you love gourmet marshmallows? Have you ever made something like this at home?


Coconut Rice Krispie Treats Recipe {Dairy Free}

Earlier this week I needed to make a snack to share with little boys. I thought I would go with a standard favorite and make Fruity Pebble Treats until I realized margarine has milk in it and I needed a snack that was free of milk and chocolate.

I started a batch of a nutella type Rice Krispie Treats... then I realized after adding the Jif version of Nutella that oops this has chocolate in it... It was irrelevant anyways because the recipe was a total flop. 

I scanned my pantry and came up with coconut oil as an ingredient a little more digging searching produced a bag of coconut flakes...

So, I created a recipe that is free of milk and chocolate for my dears that face food allergies. I wasn't sure how they would turn out so I used {Mr.} Adam as a guinea pig. He said they were good but that they were too adult for kids. I shrugged my shoulders and said "I am okay with that because I tried."

Imagine how thrilled I was to hear from the Moms a few days later that the Coconut Rice Krispie Treats were a hit and that several Moms thought they were lovely! So here is the recipe, I hope you like it too!


print recipe

Coconut Rice Krispie Treats {Dairy Free}
Dairy Free Rice Krispie Treats with a delicious coconut flavor!
Ingredients
  • 4 1/2 cup Rice Krispies
  • 10 ounces Marshmallows
  • 2 tablespoons Coconut Oil
  • 1/3 cup Coconut Flakes
  • as desired Sprinkles
Instructions
Spray a baking dish with coconut oil spray as well as a pan.Add 2 tablespoons of coconut oil and 10 ounces of marshmallows to the sprayed pan. On medium/low heat melt the oil and marshmallow. (This took about 3 minutes, be sure to stir frequently)
When the marshmallows and coconut oil melt add 4/1/2 cups of Rice Krispies and 1/3 cup of coconut flakes to the pan, stirring until the cereal is well coatedSpread the mixture into the prepared baking dish.Add sprinkles.Allow to cool for one hour.Cut into squares and serve.
Details
Prep time: Cook time: Total time: Yield: 16 servings


If you liked this easy recipe you might want to check out my Pretty Pebble Marshmallow recipe or My Nuts About Cookies Bark recipe. Thanks for dropping by today!


In The Sky Sensory Bin

Roo loves waking up to find a new sensory bin waiting on him! I love making something fun for him and knowing he will happily play with this new bin for a few hours. I got a great deal on a Toob from Safari LTD and I couldn't wait to make the In the Sky Sensory Bin.

I started with a base of Easter paper grass stuff and a few cotton balls.

Photo Credit: Sara Lehman.

I pulled the cotton balls apart slightly to fluff them up a bit.

Photo Credit: Sara Lehman.


Gently pull your cotton ball apart until it looks like a fluffy cloud.


Photo Credit: Sara Lehman.

Next add a handful of planes and balloons- or a toob (In the Sky).

Photo Credit: Sara Lehman.

And you have a neat sensory bin for kids that incorporates fun with their senses. The paper Easter grass and the cotton ball clouds offer different textures to feel. The paper grass engages the sense of hearing as it crinkles when touched. The colorful blue base engages the sense of sight with a visually appealing color. The planes open the doors to imaginative play.

Photo Credit: Sara Lehman.

Roo liked this sensory bin. He was amazed at the planes inside and he caught on quickly that the bin was the sky. He excitedly showed me all of the clouds, several planes and the paper grass which he thought was pretty neat stuff. After about an hour of playing planes he smiled and picked out a few dudes and told me it was bubble bath time! The In the Sky Sensory Bin can double as a bubble bath sensory bin in the imagination of a child.

Thanks for reading! I would love to hear about your favorite sensory bin ideas.


5 Minute Cardboard Craft

I might get a little silly about wanting to hoard cardboard, but I seriously see possibilities and an invitation to play when I see cardboard.

My son has toys on top of toys to play with, but I like it when I can inspire his imagination. It is interesting to see how he plays when presented new options.

We had an empty Similac box and I decided it would be a fun to see what I could do with it as a  5 minute project.
Photo Credit: Sara Lehman.

 I started with an empty box.  I carefully opened it up along the seam.

Photo Credit: Sara Lehman.


Then I put it back together, printed side in, brown side out. I tore of the flaps on one side so we had an opening. and I used a few strips of tape to secure the box.


Photo Credit: Sara Lehman.

I grabbed a handful of crayons and asked Roo what he wanted me to make.

Photo Credit: Sara Lehman.

He said "The Library!"

Now, don't you dare laugh at my art work!

Photo Credit: Sara Lehman.

I colored the building red and made simple windows with stick people and books.
He got the hint.


Photo Credit: Sara Lehman.

He stopped playing cars for a moment and kissed his sister. Then he realized I had in fact made the library.

Photo Credit: Sara Lehman.

 He dashed over and got the Mickey Mouse gang and took them to story time. This project took me less than 5 minutes. My son had a blast with his library and he played with it for 2 and a half days. It doubled as school and a garage for cars, then a cave for dinos.

How do you create fun activities with your kids with items you would otherwise throw away or hopefully recycle?

Find more easy kids crafts here:

Time Out Jar

I first made these calm down jars in 2014. My kids were so small that we used plastic, just in case they were dropped or thrown during a tantrum back then. While the children have grown so much since then, I have made these with them a few times. I have updated the post and included a few new photos for you.


Photo Credit: Sara Lehman.

If you need an idea that brings a little more zen and fewer tantrums, let me introduce you to the time out jar. You can call these whatever you like; a meditation jar, a calm down jar, or a time in jar. The idea remains the same, this jar can help your kids take a minute to collect themselves after a meltdown, or offer them a quiet minute for themselves anytime they want it. Plus, the results are pretty and relaxing to watch.


Photo Credit: Sara Lehman.

Make these with a plastic container, like a treehut body scrub container, if you have little kids.
If your kids are older, and would be more likely to use this as a meditation tool, feel free to use a mason jar, or even better, recycle a used food jar, like a pasta sauce container.

Photo Credit: Sara Lehman.


This is an easy craft, that all ages can help with. It is cool enough to get tweens interest, and you can use your favorite colors and whatever glitter you like. We have even added chunky confetti to time out jars.


Photo Credit: Sara Lehman.

Supplies:

1 to 2 tablespoons of glitter glue

Chunky Confetti

Glitter 

A mason jar and lid

1 ¾ water

A craft stick


Photo Credit: Sara Lehman.

Pour the warm water in the container with the glitter glue.

Photo Credit: Sara Lehman.

Add a drop or two of food coloring to the glue and water.

Photo Credit: Sara Lehman.

I lined the lid of the container with glue and firmly sealed the jar.

Photo Credit: Sara Lehman.

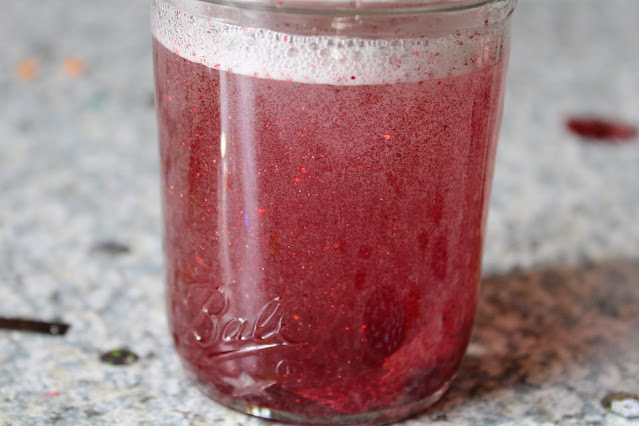
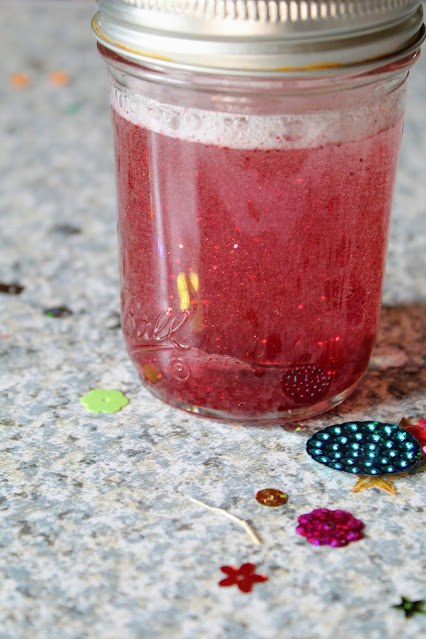
And here you have a TIME OUT JAR.


Photo Credit: Sara Lehman


You can find all of my sensory ideas here.
Egypt Sensory Play
Feeding Sharks Sensory Bag


Making Traffic Lights Preschool Craft


My son and I have a routine. In the morning he has free time, he can play as he like or watch cartoons. He can color or grab a stack of books to look at. While he has free time I work. At 10 a.m. He gets his notice that we will clean the living room together when am finished cleaning the kitchen. 

Roo takes advantage of that notice and plays as hard as he can while I work in the kitchen. If it appears that he is having a especially good time I might dash in to make beds and start a load of laundry so that he can extend his fun.

When the chores have been taken care of Roo and I pick up all of the evidence of his morning fun. 
When the blankets, pillows, toys and books have been put away and the carpet has been vacuumed it is craft time. Harper likes this part of the morning because it is her chance to get on the floor and roll around.


Each week I have 2 planned crafts and I offer Roo the chance to choose the other 3 activities for the week. Last week he told me he wanted to make a "red light". 

Hmmm. That is easy peasy! Even I can manage this one without incident!

To begin the craft we got out the disposable plates I keep in our craft supplies for projects like this one, and 4 sheets of construction paper in red, yellow, green and black. I grabbed a tube of glue and we sat down to create.

I had Roo help me tear the paper into small pieces. I thought this was a good way to work on fine motor skills and develop his pencil grip.


Next I tore the black paper into 2 strips.

I made 3 circles of glue on each paper.


I demonstrated what I wanted Roo to do. Place the little bits of paper onto the glue. At first he wasn't sure why I wanted to keep the colors separate. 

But then he saw what we were doing! How cool! We had 2 "red lights" and he was ready to play. There was no waiting for the glue to dry!

And yes, that is a spider riding a motorcycle on the tracks!

2 "red lights" were not enough. With big blue eyes Roo begged "More Red Lights Please!" So we made another one with bits of paper on one of the plates we had used earlier.

I had a happy little boy who was very interested in daily craft time and who found inspiration in our craft to jump into a serious session of imaginative play. I felt accomplished that we had a smooth craft session, we worked on fine motor skills with a high interest creation. 


I am thinking of a better option for red lights for Roo. Maybe painting them on clothes pins so he could set them up by the train tracks. What do you think? What would you try?