Showing posts with label kid crafts. Show all posts

Crafts and Snacks Inspired by Eric Carle

 Calling all crafty critters and curious caterpillars! Are you looking for a fun way to spark creativity and ignite a love for art in your little ones? Then dive into the wonderful world of Eric Carle!

Eric Carle, the beloved author and illustrator behind classics like "The Very Hungry Caterpillar" and "Brown Bear, Brown Bear, What Do You See?", is known for his vibrant collages and whimsical characters. His art style is not only visually captivating but also surprisingly easy to recreate, making him the perfect inspiration for engaging and educational crafts for children of all ages.


A World of Colourful Creations:

This blog post is your one-stop shop for exploring Eric Carle-inspired crafts! We'll be featuring a variety of tutorials designed to bring your favorite Carle characters to life. Get ready to:

  • Chomp Your Way Through a Colorful Caterpillar: We'll show you how to create a delightful "Very Hungry Caterpillar" using construction paper, paint, and some wiggle eyes.
  • See What the Brown Bear Sees: Craft a vibrant menagerie of animals inspired by "Brown Bear, Brown Bear, What Do You See?" using tissue paper and cardstock.
  • Let Your Creativity Bloom: Unleash your inner artist with a Carle-inspired collage project. We'll guide you through creating beautiful textured paper using paints and household objects, perfect for crafting anything your imagination desires!

Be sure to click through the links below to view the full tutorials.

Cotton Ball Polar Bears by Simply Full of Delight


Apple Printed Caterpillars by Sweet Silly Sara

Eric Carle Style Easter Eggs by Red Ted Art

Egg Carton Caterpillar by Crafty Art Ideas

Hungry Caterpillar Fruit Pizzas by A Little Pinch of Perfect


Mixed Media Hungry Caterpillar Art  by Kids Activities Blog

Thumbprint Caterpillars by Simply Full of Delight

Easy Egg Carton and Pipe Cleaner Caterpillars by Simply Full of Delight

Very Busy Spider Snack by The Healthy Family Project

Hungry Caterpillar Sensory Snack by A Little Pinch of Perfect


Hungry Caterpillar Puppets by Messy Little Monster

Hungry Caterpillar Cupcakes by Imaginative Homeschool

Two Headed Paper Plate Snakes by In the Playroom

Hungry Caterpillar Sensory Bin by Mama of Mini’s

Hungry Caterpillar Cookies by Buttercream Parties


Eric Carle Apple Cookies by The Monday Box

Hermit Crab Craft by Little Ladoo

Brown Bear Bento Box by Healthy Family Project


Beyond the Craft Table:

The beauty of Eric Carle crafts is that they're more than just fun activities. They can be a springboard for learning and exploration. Here are some ways to extend the experience:

  • Story Time Fun: After crafting your favorite Carle characters, revisit the original books and act out the stories together.
  • Explore Colors: Use your Carle creations as a jumping-off point to discuss different colors, shapes, and textures.
  • Animal Adventures: Learn about the different animals featured in Carle's books and their habitats.

So grab your scissors, glue, and a sprinkle of creativity – it's time to embark on an artistic adventure inspired by the world of Eric Carle! Stay tuned for our upcoming craft tutorials, where we'll show you step-by-step how to create these delightful projects and bring the magic of Carle's art to life!


Find more awesome crafts for kids:

Easy Ipad stands

Lego Stamped Pumpkins

Apple Process Art

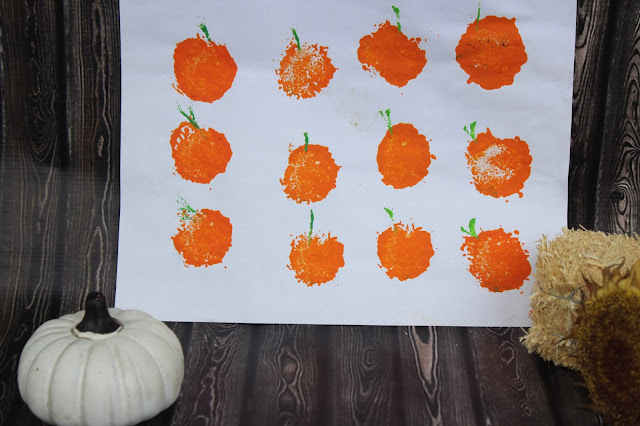
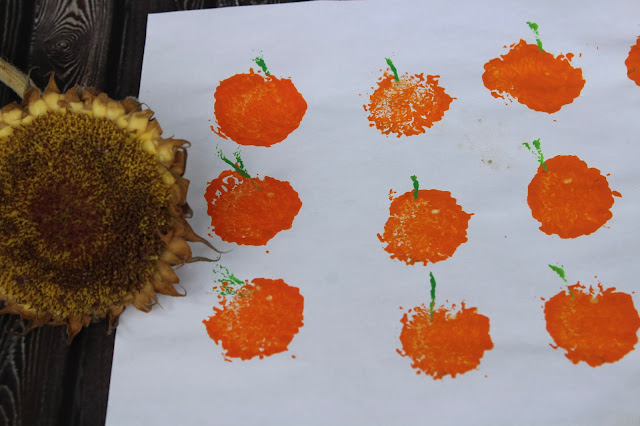
Sunflower Stamped Pumpkin Patch Art


This adorable pumpkin patch art is great for kids of all ages! Made with simple supplies like paint, paper and a sunflower head, this is a great way to create art using nature!


Harper and I love to paint together. We have been crafting side by side since she was just a tiny toddler, strapped into a high chair for safety. We have painted pineapples, apples, baskets of fruit and even Christmas trees. We usually use corks to create our process art, but we had a bouquet of sunflowers that had seen better days, and well, inspiration hit.

We decided our fridge just had to have a pumpkin patch scene. We are all about creating refrigerator masterpieces 

Supplies:

Orange paint

Green paint

A sunflower head

White paper

A paper plate


Pour orange paint and a small amount of green paint onto a paper plate.


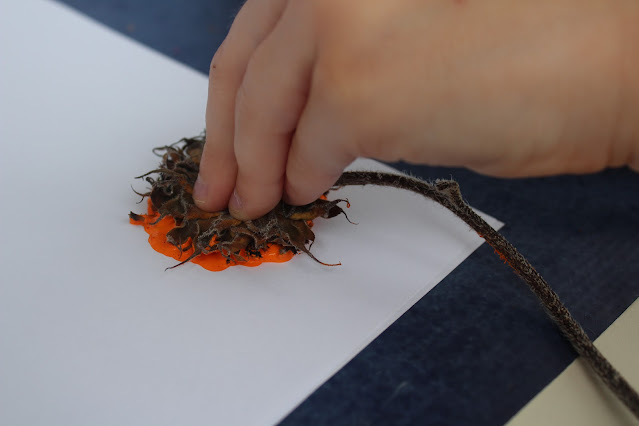
Invite your child to press the sunflower head into the orange paint.

Encourage your child to press the sunflower onto the paper.


Use a stem, petal, or other small item to form the stem of the pumpkin with the green paint.

Allow the paint to dry, then


These were so much fun to make! And I think they turned out really cute! Harper was very proud of her efforts. Preschoolers can handle this project, as well as elementary aged kids like Harper. Your kids might also like to draw little pumpkin faces on these after they have dried.


I hope you get a chance to try this project with your family, it is the perfect project for a fall afternoon!

Find more fall ideas here.


Pineapple Process Art

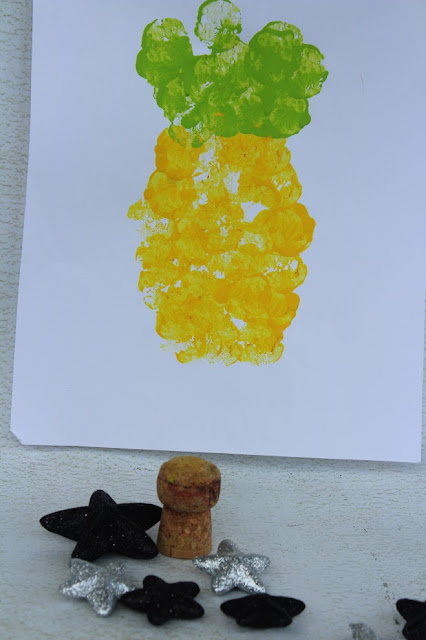
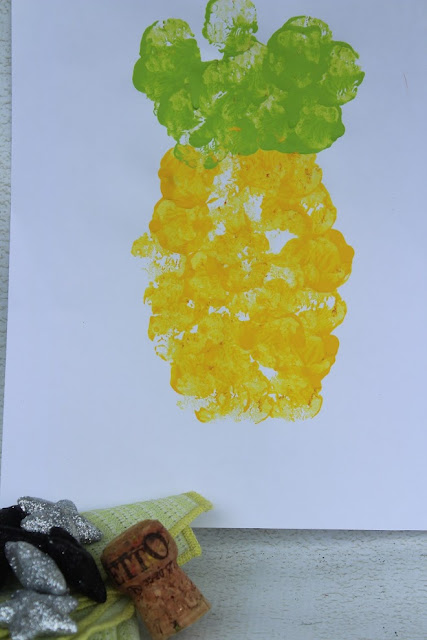
 This pineapple painting project is perfect for little ones. It takes only a moment of set up and it creates such a cute art project! Kids are going to be so proud of their efforts and want to display this project on the fridge door gallery!


Harper and I love to get creative together. We are always crafting, painting or baking something. 
You might remember we made this adorable apple process art with a cork.  Well, we ran across the cork again and decided that it was so fun to paint with it, that we would give it another go. We came up with this cute pineapple art. We love it because it can work for a summer day project, or pull this out around the new year to bring good luck to your space.


Supplies:

Paper Plate

Yellow and Green Paint

A Cork

Copy Paper


Pour a quarter size drop of several shades of yellow and a shade of green onto a paper plate.


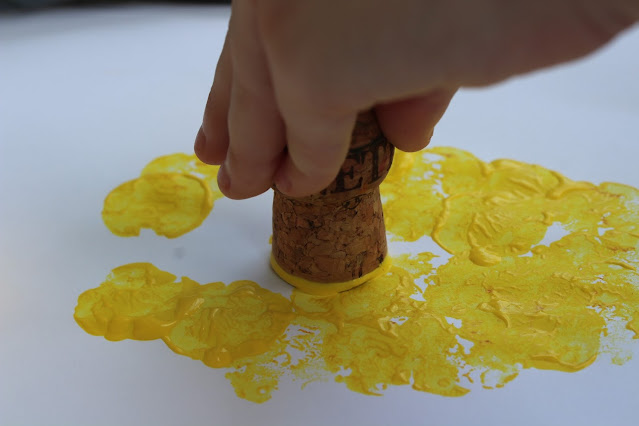
Offer your child the cork and encourage the child to stamp a pineapple shape with the yellow paints.


When the pineapple is shaped encourage the child to form the stem of the pineapple with green paint.


                                                             Allow the art to dry then display.


This is a fun project for summertime, but I also love to make these with the kids in anticipation of new year since the pineapple symbolizes a warm welcome, celebration and hospitality.


You can find more process art ideas here

Basket of fruit process art

Cork and button tree art

If you want to learn more about why process art is important for kids this is a great resource from Messy Little Monster

Christmas Tree Process Art

 This is such a fun way for kids to paint, without using any brushes! It creates a lovely work of art that adds just the right touch of kid made cheer to your space!


My youngest and I love to paint together. We are always thinking of things to paint, without turning to a paint brush. We came up with this adorable process art using only a cork, a pencil eraser, and some paint. This is the perfect seasonal art project for kids.


Supplies:
Paint in green, red, yellow and brown
A pencil with an eraser
A paper plate
A cork
Paper


Directions:
Pour a little squirt of each color of paint on a paper plate.
Offer your child a pencil with an eraser and a cork.
Encourage your child to form the tree shape by stamping in the green paint, then adding one stamp to the paper.
On the next line, make two stamps.
On the third line, stamp 3 times. You get the idea.
After the tree is formed, using the eraser, dip into the other colors of paint, and start decorating the tree.


                     Use whatever colors you like for the ornaments. We used red, blue and yellow.


                                          Next form the tree trunk with brown paint.

                                         Allow to dry and display.

Isn't this such a cute holiday process art idea? Preschoolers and toddlers might enjoy this too!


You can find all of our Christmas crafts here.

Reader favorites include:

Gnome ornaments

12+ Tree Crafts for Kids

 Fall is near and I am super excited about crafting with my kids! We love to display our work around the house and add a festive touch to our decor.  If you are looking for some cute as can be ways to craft trees with the kids, you are in the right spot! i found 12+ Tree Crafts for Kids to share with you.

Click through the links to check out the tutorials. There are some really fun ideas on this list; for all ages and skill levels. 


Puzzle Piece Tree
Torn Paper Trees
Autumn Splatter Trees
Leaf Stamped Trees
Dish Brush Trees
Twig Paintings
Pumpkin Seed Tree Art
Hand-print Fall Tree Project
Fingerprint Autumn Trees
Autumn Button Branch
Fall Tree Sun-catchers
Tree Silhouette Place-mats

Which of these ideas do you think your kids would love the most? If you have a tree craft I would love to hear about it in a comment! 

You can find all of our favorite kids crafts for fall here

Easy Gnome Christmas Ornaments

These easy Gnome Christmas ornaments are perfect for crafting with the kids this holiday season.


We love to make easy crafts with the items we already have on hand. Some of my best ideas and favorite projects have stemmed from the junk drawer and items destined for the trash. These Christmas gnome ornaments are a great example of what you can make with simple stuff you probably already have.


These are awesome because with a different pattern of paper, or bigger googly eyes, your gnome looks totally different. If you don't have the supplies in the junk drawer or your craft supplies, you can get all of these things from Dollar Tree or even better- improvise!


Supplies per 1 gnome:

2 googly craft eyes
3 craft sticks
cotton balls
Red Pom Pom
Glue
Brown Bag
Scrap Book Paper
Confetti
Sharpie
Ribbon


Directions:

With the 3 craft sticks glue them together to form a triangle.


Cut a triangle from the brown bag to fit in the craft stick frame.


Add a generous amount of glue to the craft sticks and place the bag on top of it.


Cut a smaller triangle from scrap book paper to form the hat of your gnome.


Add eyes, a pom pom nose and draw on a mouth with a sharpie.


Add a chunk of confetti or some type of adornment to the hat.
Add a row of cotton balls for the beard.


Flip the gnome over and glue a ribbon to the back.


Hang your cute and easy gnome Christmas ornaments from your tree or share them with friends and family!


You can make dozens of these and make them all unique by simply changing the paper of the hats and the size of the pom pom of the nose.


This is such a fun craft to make with the kids! We loved making and naming our gnome ornaments!


Find all of our DIY Christmas Ornaments here.


DIY Pumpkin Window Cling

We love to decorate for holidays and Halloween is no exception. This DIY idea makes fun window clings with simple ingredients for a one of a kind look this season!


The kids are excited about Halloween this year! As soon as they saw Halloween decor popping up in stores, they were ready to buy something! Seeing how cute they are, I couldn't deny them their wish. But, I did draw the line at 2 items. We placed a cute ghost on our door in mid-August...

Luckily, the fun of Halloween is still going strong here! The kids and I made some adorable window clings that I can't wait to share with you guys! Today we will go over how we made these cute and easy Pumpkin Window Clings!


Supplies

Transparent Contact Paper
Scissors
Black, Orange and Green Construction Paper


Have the kids tear the orange paper into little strips and bits.


Then cut the pumpkins face out of the black paper. Tear whatever black remains into small bits and strips.

Peel the backing off of your contact paper and lay it sticky side up.

Place the face of the pumpkin on the sticky side of the paper.


 Next outline the shape of your pumpkin in orange.


Then fill the outline in with orange paper.


Next tear one small bit of green paper for a stem and add it to the top of the pumpkin. Begin to fill in the rest of the area with black paper.


Then you can stick this right to your window. The little areas that aren't covered with paper will adhere to the window, but not so much that it makes peeling it off a bother. You can reinforce the edges with tape if you need to or desire.


And there you have a really easy, fun and cheap way to make a window cling! My kids had a lot of fun with this idea and I think yours will too!


You can find all of my Halloween crafts here

Glam Pumpkin Makeover

Paper Plate Witch


11 Apple Crafts to Make with the Kids

I can't help but get excited about the end of summer, because it means that fall is near! Trips to the orchard with the family; lots of action in the kitchen, the temps are finally cool enough for baking! And of course, the crafting with the kids! How could I not get excited for fall!? 

This year I have 11 apple craft to make with the kids to share with you that I know you will have fun making with your little ones!

 Apple Crafts to Make with the Kids


Toilet Paper Roll Apple Stamp
Paper Plate Apple Craft
Caramel Apple Fall Craft
Apple Suncatchers
Take a Bite Out of Fall Craft
Apple Playdough
Button Apple Trees
Fruit Loop Fall Tree
Apple Tree Craft
Toilet Roll Apples
Stuffed Paper Apples


I love all of these ideas! I am hoping to make them all with the kids! We are planning to make these Apple Tree Window Clings again this year but we might make it a crafting marathon with these great ideas!

You can find my Halloween posts here

You might also like this easy homemade play dough recipe

Kid Made Straw Necklaces

Bling; made for kids, by kids!


My kids really like to get crafty. They also like to peek in my jewelry box and beg to wear all of the pretty things! So we set out to see what we could create with things we already had at home. This is what we came up with. Straw Necklaces!

You will need:
*Straws
*Bakers twine or yarn
*Glue
*Scissors


Rolf was kind enough to cut the straws for both of the necklaces we made.


We simply added a bead of glue to one side of a straw, then pressed it onto another. Repeat until you are out of straws.


Thread your string, twine or yarn through one straw and tie to make the necklace.


This was a fun craft for both kids. Harp was pleased to have her own "bling" that she made by herself.