Coconut Rice Krispie Treats Recipe {Dairy Free}

Earlier this week I needed to make a snack to share with little boys. I thought I would go with a standard favorite and make Fruity Pebble Treats until I realized margarine has milk in it and I needed a snack that was free of milk and chocolate.

I started a batch of a nutella type Rice Krispie Treats... then I realized after adding the Jif version of Nutella that oops this has chocolate in it... It was irrelevant anyways because the recipe was a total flop. 

I scanned my pantry and came up with coconut oil as an ingredient a little more digging searching produced a bag of coconut flakes...

So, I created a recipe that is free of milk and chocolate for my dears that face food allergies. I wasn't sure how they would turn out so I used {Mr.} Adam as a guinea pig. He said they were good but that they were too adult for kids. I shrugged my shoulders and said "I am okay with that because I tried."

Imagine how thrilled I was to hear from the Moms a few days later that the Coconut Rice Krispie Treats were a hit and that several Moms thought they were lovely! So here is the recipe, I hope you like it too!


print recipe

Coconut Rice Krispie Treats {Dairy Free}
Dairy Free Rice Krispie Treats with a delicious coconut flavor!
Ingredients
  • 4 1/2 cup Rice Krispies
  • 10 ounces Marshmallows
  • 2 tablespoons Coconut Oil
  • 1/3 cup Coconut Flakes
  • as desired Sprinkles
Instructions
Spray a baking dish with coconut oil spray as well as a pan.Add 2 tablespoons of coconut oil and 10 ounces of marshmallows to the sprayed pan. On medium/low heat melt the oil and marshmallow. (This took about 3 minutes, be sure to stir frequently)
When the marshmallows and coconut oil melt add 4/1/2 cups of Rice Krispies and 1/3 cup of coconut flakes to the pan, stirring until the cereal is well coatedSpread the mixture into the prepared baking dish.Add sprinkles.Allow to cool for one hour.Cut into squares and serve.
Details
Prep time: Cook time: Total time: Yield: 16 servings


If you liked this easy recipe you might want to check out my Pretty Pebble Marshmallow recipe or My Nuts About Cookies Bark recipe. Thanks for dropping by today!


Sushi Sensory Bin

A few weeks ago while shopping at my Kroger I saw these adorable erasers- sushi style- in the clearance section. At 69 cents they were a steal. I couldn't pass them up! My husband said "What are you going to do with them?".

What am I going to do with them? Make a sensory bin of course! A Sushi themed sensory bin sounded like fun to me!

I picked up a bag of long grain white rice, one pound was on sale for $1.09. I used this as my base.


My son was intrigued. He couldn't wait to get his hands in the bin of rice!

Next we added our Sushi Erasers.


Again, Eager Hands were grasping to get involved. Not that I can blame him!

Finally, we finished the bin off with a pair of chopsticks.


And there you have our under $2 sensory bin! It was easy to make and fun for Roo to play with.

I liked that we could enjoy the feeling of rice when we touched the bin, the rice was fun for roo to dig around in. He likes the way it sounds when he picks up a handful and drops it in the bin. The chopsticks are great for his fine motor skill development.

When he grew tired of picking up the erasers with the chopsticks he fed rice to an assortment of dinosaurs. Then he decided to toss handfuls of rice into his barnyard toy for the other animals to eat... and yes, it got messy. But, I went with it! After all this was my big idea of fun and dried rice is pretty easy to sweep up.

Do you engage in sensory play with your kids? I would love to hear about your favorite sensory bins.


Double Chocolate Covered Marshmallows

Fancy Marshmallows are kind of becoming my thing. They are easy to make and they are always a hit with the crowd. 

If I have had a busy day and I didn't have time to bake or no bake something, I can whip up a few pretty marshmallows in 5 minutes flat and enjoy the oohs and aahhs from my family when I serve them.

Tonight I made a half dozen of double chocolate covered marshmallows.

This is so easy anyone and I mean anyone can make them.


You will need:

Large Marshmallows
Mini Chocolate Chips

I used 1/4 cup of mini chocolate chips for the first coating and 1/4 cup for the second coating.

Place 1/4 cup of chocolate chips into a small dish, set aside for a moment.

Spray a very small microwave safe dish with cooking spray. Add 1/4 cup of chocolate chips. Microwave for 30 seconds, then stir. Microwave for 30 additional seconds and stir. If the chips blend smooth upon the second stirring it is ready. If not, microwave for 15 seconds and stir, repeating as needed.

Dip your marshmallows into the melted chocolate then into the mini chocolate chips. Place on a plate and repeat until you run out of marshmallows or melted chocolate.

Allow the marshmallows to rest for about 30 minutes until the chocolate has hardened. Serve with a smile, store leftovers, on the odd chance there are any, in a ziploc baggie.

If you like chocolate covered marshmallows, check out my Chocolate Covered Marshmallows With Coconut recipe.

Tell Me About It Tuesday 4/7

Welcome to Tell Me About It Tuesday!
If you are new here we are glad to have you with us! If you are a returning party guest, it is a pleasure to see you again!
As always,
Thanks to our hosts!


Let me tell you about my life since the last party:

Sweet Silly Sara has been a busy lady as of late! Baking, cooking, cleaning, blogging, creating, working and the most important mommying. The kids are great, they are growing, they are healthy, they are gorgeous.


I would love for you to leave me a comment. Tell Me About It, I want to hear about your week!

Okay, now on to the good stuff

The most clicked link was


April's favorite was:


Grocery Store Scavenger Hunt by Play 2 Learn With Sarah

Sara's favorite was:


Banana Blueberry Muffins by Mommy on Demand

Jacqui's favorite was:


Ranch Chicken... by An Everyday Blessing


Thank you for dropping by to link up. I can't wait to see what you have to share this week!
Remember, please follow the hostesses. Link up anything family friendly that you like, except giveaways and etsy shops!

Don't link and run, visit a few links please! Everyone loves comments or shares {hint, hint, wink, nudge}

Please note that by linking up to Tell Me About It Tuesday you are granting the hostesses permission to share your post on our social media accounts and or in round up posts. We may also feature your work in the next party.


Every link in this party will be visited and pinned to our Tell Me About It Tuesday board, so show us what you've got!


In The Sky Sensory Bin

Roo loves waking up to find a new sensory bin waiting on him! I love making something fun for him and knowing he will happily play with this new bin for a few hours. I got a great deal on a Toob from Safari LTD and I couldn't wait to make the In the Sky Sensory Bin.

I started with a base of Easter paper grass stuff and a few cotton balls.

Photo Credit: Sara Lehman.

I pulled the cotton balls apart slightly to fluff them up a bit.

Photo Credit: Sara Lehman.


Gently pull your cotton ball apart until it looks like a fluffy cloud.


Photo Credit: Sara Lehman.

Next add a handful of planes and balloons- or a toob (In the Sky).

Photo Credit: Sara Lehman.

And you have a neat sensory bin for kids that incorporates fun with their senses. The paper Easter grass and the cotton ball clouds offer different textures to feel. The paper grass engages the sense of hearing as it crinkles when touched. The colorful blue base engages the sense of sight with a visually appealing color. The planes open the doors to imaginative play.

Photo Credit: Sara Lehman.

Roo liked this sensory bin. He was amazed at the planes inside and he caught on quickly that the bin was the sky. He excitedly showed me all of the clouds, several planes and the paper grass which he thought was pretty neat stuff. After about an hour of playing planes he smiled and picked out a few dudes and told me it was bubble bath time! The In the Sky Sensory Bin can double as a bubble bath sensory bin in the imagination of a child.

Thanks for reading! I would love to hear about your favorite sensory bin ideas.


Nuts About Cookies Bark

When you have a very busy child underfoot and an infant to contend with the chances of baking a cake from scratch are slim to none. Too often dinner comes from the freezer or sadly it comes home in a brown bag and Styrofoam containers. Dessert? Think stale cake from the bakery. Plastic wrapped cookies. Yeah. I never claimed to be the perfect wife or mother. I seriously lack in the cooking department if you are seeking home cooking or from scratch cooking. Instead of beating myself up about not being June Clever, I realized that I don't have to make everything from scratch. This inspired me so I started playing around with ingredients I had on hand and I came up with a yummy dessert that took less than 5 minutes to create.

I came up with Nuts for Cookies Bark. It was nothing short of awesome! To create Nuts for Cookies Bark you will need:

Photo Credit: Sara Lehman.


10-18 crushed oreo cookies (I broke mine into chunks)
1/2 cup od pecans, crushed
1 bag of semi sweet chocolate chips


Spray a microwave safe bowl with cooking spray. Pour chocolate chips into the bowl and microwave, stirring every 30 seconds until the chips are melted and can be stirred smooth.

Photo Credit: Sara Lehman.

While the chocolate chips are melting, place half of the cookies and nuts into the bottom of a container, you could use a baking dish or a cookie sheet. Pour the melted chocolate over the base. Top with the remaining cookies and nuts.

Photo Credit: Sara Lehman.

Allow to cool at room temperature for about an hour. Then cover with plastic wrap and place in the refrigerator for about 2 hours so that the bark will set and harden properly.

Before serving, allow to set at room temperature for a few moments. Break into chunks and serve.

Find more yummy desserts here:

Chocolate Covered Marshmallow with Coconut

We had another snow storm on Saturday of last week. While I watched the snow blowing from my window I decided to make a dessert that would take no more than 5 minutes to prepare and that would give us a little taste of the tropics to ease the pain of another winter storm.

Photo Credit: Sara Lehman.

To make Chocolate Covered Marshmallows with Coconut you will need:

1/2 a bag of milk chocolate chips
2-4 tablespoons of shredded coconut depending upon your preferences (completely coated, partially coated etc)
10 jumbo marshmallows
Cooking Spray


Start by spraying a microwave safe bowl with cooking spray.
Add chocolate chips to the bowl. 
Place your coconut in another small bowl.
Microwave for 30 seconds, stir and repeat until the chocolate chips are melted and smooth.

Dip a marshmallow in melted chocolate. Roll it in the coconut, set aside on a wax or parchment paper lined plate. Allow to harden, about an hour. You can speed this up by placing the marshmallows in the refrigerator for about 20 minutes.

If you love chocolate and marshmallows- hop over to check out my Double Chocolate Covered Marshmallow Recipe.


5 Minute Cardboard Craft

I might get a little silly about wanting to hoard cardboard, but I seriously see possibilities and an invitation to play when I see cardboard.

My son has toys on top of toys to play with, but I like it when I can inspire his imagination. It is interesting to see how he plays when presented new options.

We had an empty Similac box and I decided it would be a fun to see what I could do with it as a  5 minute project.
Photo Credit: Sara Lehman.

 I started with an empty box.  I carefully opened it up along the seam.

Photo Credit: Sara Lehman.


Then I put it back together, printed side in, brown side out. I tore of the flaps on one side so we had an opening. and I used a few strips of tape to secure the box.


Photo Credit: Sara Lehman.

I grabbed a handful of crayons and asked Roo what he wanted me to make.

Photo Credit: Sara Lehman.

He said "The Library!"

Now, don't you dare laugh at my art work!

Photo Credit: Sara Lehman.

I colored the building red and made simple windows with stick people and books.
He got the hint.


Photo Credit: Sara Lehman.

He stopped playing cars for a moment and kissed his sister. Then he realized I had in fact made the library.

Photo Credit: Sara Lehman.

 He dashed over and got the Mickey Mouse gang and took them to story time. This project took me less than 5 minutes. My son had a blast with his library and he played with it for 2 and a half days. It doubled as school and a garage for cars, then a cave for dinos.

How do you create fun activities with your kids with items you would otherwise throw away or hopefully recycle?

Find more easy kids crafts here:

Time Out Jar

I first made these calm down jars in 2014. My kids were so small that we used plastic, just in case they were dropped or thrown during a tantrum back then. While the children have grown so much since then, I have made these with them a few times. I have updated the post and included a few new photos for you.


Photo Credit: Sara Lehman.

If you need an idea that brings a little more zen and fewer tantrums, let me introduce you to the time out jar. You can call these whatever you like; a meditation jar, a calm down jar, or a time in jar. The idea remains the same, this jar can help your kids take a minute to collect themselves after a meltdown, or offer them a quiet minute for themselves anytime they want it. Plus, the results are pretty and relaxing to watch.


Photo Credit: Sara Lehman.

Make these with a plastic container, like a treehut body scrub container, if you have little kids.
If your kids are older, and would be more likely to use this as a meditation tool, feel free to use a mason jar, or even better, recycle a used food jar, like a pasta sauce container.

Photo Credit: Sara Lehman.


This is an easy craft, that all ages can help with. It is cool enough to get tweens interest, and you can use your favorite colors and whatever glitter you like. We have even added chunky confetti to time out jars.


Photo Credit: Sara Lehman.

Supplies:

1 to 2 tablespoons of glitter glue

Chunky Confetti

Glitter 

A mason jar and lid

1 ¾ water

A craft stick


Photo Credit: Sara Lehman.

Pour the warm water in the container with the glitter glue.

Photo Credit: Sara Lehman.

Add a drop or two of food coloring to the glue and water.

Photo Credit: Sara Lehman.

I lined the lid of the container with glue and firmly sealed the jar.

Photo Credit: Sara Lehman.

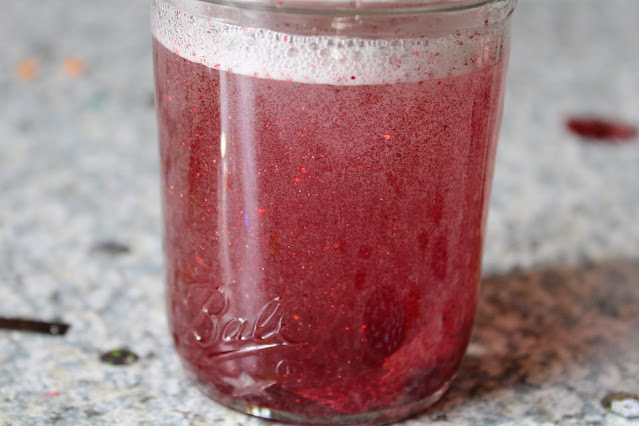
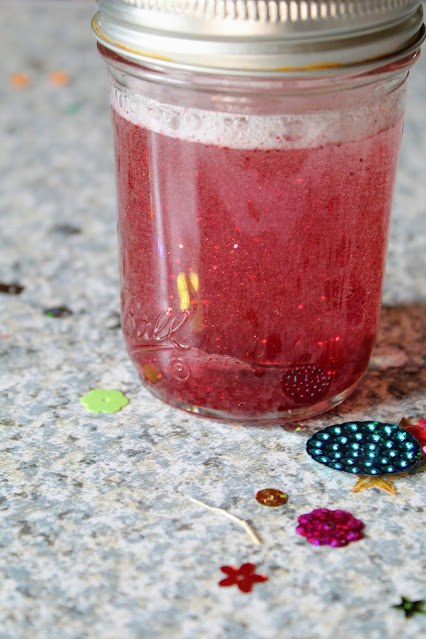
And here you have a TIME OUT JAR.


Photo Credit: Sara Lehman


You can find all of my sensory ideas here.
Egypt Sensory Play
Feeding Sharks Sensory Bag


Making Traffic Lights Preschool Craft


My son and I have a routine. In the morning he has free time, he can play as he like or watch cartoons. He can color or grab a stack of books to look at. While he has free time I work. At 10 a.m. He gets his notice that we will clean the living room together when am finished cleaning the kitchen. 

Roo takes advantage of that notice and plays as hard as he can while I work in the kitchen. If it appears that he is having a especially good time I might dash in to make beds and start a load of laundry so that he can extend his fun.

When the chores have been taken care of Roo and I pick up all of the evidence of his morning fun. 
When the blankets, pillows, toys and books have been put away and the carpet has been vacuumed it is craft time. Harper likes this part of the morning because it is her chance to get on the floor and roll around.


Each week I have 2 planned crafts and I offer Roo the chance to choose the other 3 activities for the week. Last week he told me he wanted to make a "red light". 

Hmmm. That is easy peasy! Even I can manage this one without incident!

To begin the craft we got out the disposable plates I keep in our craft supplies for projects like this one, and 4 sheets of construction paper in red, yellow, green and black. I grabbed a tube of glue and we sat down to create.

I had Roo help me tear the paper into small pieces. I thought this was a good way to work on fine motor skills and develop his pencil grip.


Next I tore the black paper into 2 strips.

I made 3 circles of glue on each paper.


I demonstrated what I wanted Roo to do. Place the little bits of paper onto the glue. At first he wasn't sure why I wanted to keep the colors separate. 

But then he saw what we were doing! How cool! We had 2 "red lights" and he was ready to play. There was no waiting for the glue to dry!

And yes, that is a spider riding a motorcycle on the tracks!

2 "red lights" were not enough. With big blue eyes Roo begged "More Red Lights Please!" So we made another one with bits of paper on one of the plates we had used earlier.

I had a happy little boy who was very interested in daily craft time and who found inspiration in our craft to jump into a serious session of imaginative play. I felt accomplished that we had a smooth craft session, we worked on fine motor skills with a high interest creation. 


I am thinking of a better option for red lights for Roo. Maybe painting them on clothes pins so he could set them up by the train tracks. What do you think? What would you try?

A Clean Home Challenge: Crock Pot Cleaning

I love my crock pot. I use it often! Several times a week I prepare something fantastic in my beloved crock pot. With a new baby I don't know how I would manage to prepare dinner without it. The last time I put my favorite small appliance to use I realized the interior was looking pretty funky and I made a note to clean it.


Now, how does one go about cleaning a crock pot? I saw a lot of suggestions online, from using a general cleaner, to using oxi clean, brillo pads and so on. I thought there had to be a less expensive way to maintain my crock pot so I kept searching. Someone suggested using a baking soda paste and I was anxious to try it. I had a box of baking soda in my pantry and the idea of cleaning without a harsh chemical really appealed to me.

This is what my crock pot looked like before I cleaned it.


I made a paste of 3 tablespoons of baking soda to 1 teaspoon of water.


                     Then I rubbed the paste into the base of the crock pot.

               Let this sit for about 20 minutes, then use a damp rag to wipe the baking soda off.


The baking soda scrubbed much of the dingy baked on mess out of the crock pot easily.

While the crock pot wasn't restored to its brand new splendor, it sure looked a lot better!


If you have very stubborn stains after the baking soda scrub you can apply dish soap to the stubborn baked on spots and let it set overnight. The dish soap will break up the baked on residue and will wipe off easily with a damp towel. My crock pot wasn't that bad so I didn't require this last step, but I feel confident it would work because If I have a baked on mess on any dishes this is the method I use. 

If your crock pot needs a good cleaning, this method will work well for you and it will only cost you pennies.
How do you keep your crock pot clean?

Recycled Heart Shaped Crayons

Over the years my husband and I have created a bucket of crayons. When we find them around the house (which is inevitable when you have little kids and encourage them to create) we toss them into a plastic pail. One day last week I got the pail out and turned to get the cardboard we were going to draw on. My cute little boy giggled and dumped roughly 300 broken crayons on the floor...


Okay. That is just insane. Why is there a pail with that many broken crayons in it? Who wants to use a tiny little crayon? But... I hate to throw away something I can use in another way. Of course, I thought... I could make candles, use the crayons to color the wax, blah blah blah. I don't have time to make hand poured candles. I also don't want to invest a ton of money into reusing broken crayons. So scratch that idea.


The pail went back to the normal spot and I moved on.

A few days later I saw silicone molds at WalMart in heart shapes. I found $3 and some change to be a better investment and a way to use the broken crayons.

I went home and decided oh this is such a super easy idea! Even I can do this without running into a snag!

So I grabbed the pail of crayon mess and thought I would slip the sleeve of the crayon right off and be in business.

Not so, I quickly found out as I was digging at the paper, getting wax under my nails and rethinking the entire thing. What a pain in the butt! {Mr}Adam, darling husband, came to the rescue. He kindly used his pocket knife and helped me to cut the paper so it was easy to peel off.


 After the paper was removed I broke the crayon (if it wasn't already broken) in half.


 I filled the silicon molds to the brim with broken crayons. I went for general color mixture. (All shades of red mixed together, all green, etc.)


 After about 7 minutes in a 350 degree oven they were completely melted.

I could have added a few more broken crayons to make a thicker heart crayon or taken a few away for thinner ones. I liked the ones I made as is.

I allowed the melted crayons to cool completely in the silicon molds. Getting them out of the molds was as easy as could be.


Since this was one project I know I can handle and repeat without any issue I decided to give all 30 that I made to {Mr} Adam, husband extraordinaire, for the classroom Valentines Party.

After my husband stepped in and helped me with the crayon sleeve this project was really easy and fun too. I am planning to find other silicone molds and try different designs.

On a side note, I had 2 odd shaped ice cube trays. One was an ocean them, one an ice tube type. I decided to try these out too.

While it did work, I found the silicone option to be easier. With the ice cube trays I found I had to give them a light spray of cooking spray stuff. Then I had to wipe down the recycled crayons after removing them from the mold to make sure they weren't greasy. (For my time and effort I prefer the silicon trays).

I realize this would have been perfect for a Valentines Day post, but it is really a perfect after Valentines Day craft because you can probably get the silicone molds super cheap on clearance now.

The next batch I make I think I will add one color that is off in each one. I am thinking one blue in a group of green. One red in a group of pink and so on to make the colors unique and fun.

This is the end result.


They were pretty cute and I was thrilled that I made this with next to no drama.

Until next time,
Sweet Silly Sara